Guide on Gathering, Preserving, and Storing Garlic Bulbs
Digging into the art of harvesting, curing, and storing garlic? Here's the lowdown on making your home-grown garlic last for months. Whether you're partaking in the Beginner's Garden Podcast or reading this post, we've got you covered.
So, when's it time to pluck out your garlic? When about half of the leaves transform from vibrant green to a plaster of brown hue, it's go-time. Waiting for all leaves to turn brown can lead to separation of cloves, causing them to not store as well.
As for the best day to dig out your garlic, choose a cloudy day with moist-but-not-saturated soil. It makes the whole process smoother - and your life, too. Aim to harvest a few days after a good rain, kids.
Once you've grabbed those glorious garlic bulbs, do not yank them out by the stems – they're fragile creatures and need to stay intact during the curing process. Instead, use a trowel to gently dig around them without nicking the bulb. (Oops, if you inadvertently do, set that one aside for quick-cookin'.) As the soil breaks loose, those bulbs will be easy to fish out. Shake off the excess dirt and transport them to a shady nook immediately.
After a few weeks of curing (3-4 weeks, typically), your garlic will be ready for long-term slumber in your pantry. For this stage, you can leave the roots attached, resist the temptation to wash 'em, and allow any lingering dirt to dry and brush off. Display your bulbs somewhere they can breathe, such as an old chain link fence, chicken wire, or bunches hung up. Just keep 'em spaced apart and ensure there's plenty of evaporating airflow happening.
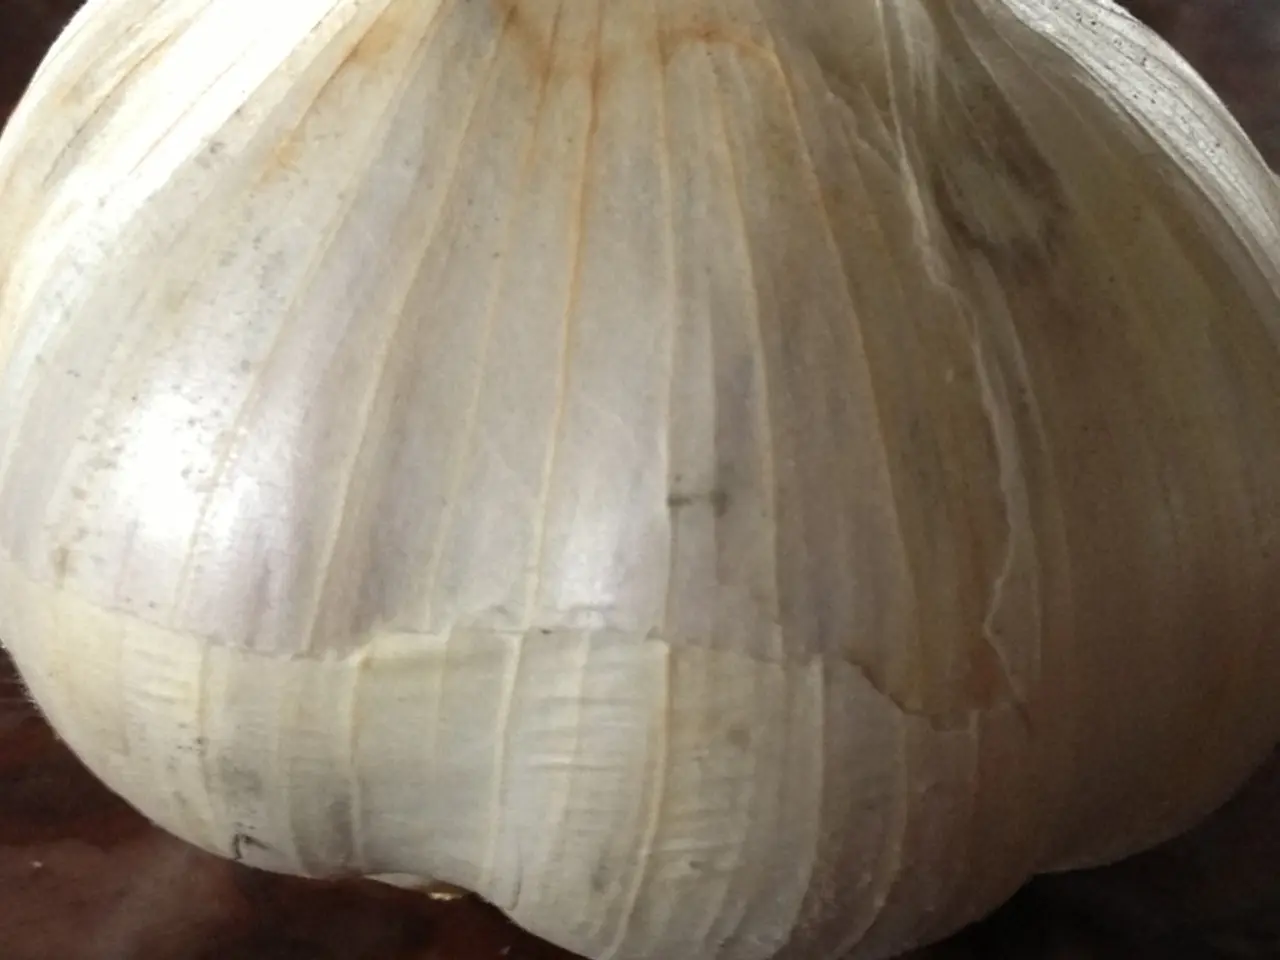
Throughout the curing process, keep an eye on those bulbs as they'll eventually shrivel and turn into crispy brown little critters. To ensure they're completely dried, give one a squeeze. If all you feel are dry leaves, your garlic has been transformed.
When the final curing steps have been completed, trim those roots and give the remaining dirt a gentle vacuum. Be gentle with that protective casing surrounding those cloves – it needs to remain intact for proper long-term storage. Stash your bulbs in a well-ventilated container or braid 'em if you wanna get fancy. The goal here is a cool location with lots of airflow, man.
To take things up a notch, you can store your best and biggest bulbs to plant for next season. As a rule of thumb, line up one clove per bulb, and do the math to ensure you've got enough for the garden's future.
A word of advice before parting ways, my friend: soft neck varieties store longer than hard neck ones, but every variety is unique, so do a little online research to understand what you can expect from yours. With regular check-ups, you'll be able to cut off any brown spots and keep using the rest of the clove for your cooking needs, even as your stash starts losing its vigor.
By grasping the fundamental nuances of harvesting, curing, and storing garlic, your pantry will be bursting with delectable garlic for the coming months. And, of course, don't forget to save some top-notch bulbs for replanting in the fall, ensuring next season's harvest of garlic goodness!
Cheat Sheet for Garlic Planting
Care to become a garlic-growing pro? All you need is some essential intel:
- When to plant: With the arrival of fall, around September or October, depending on your climate.
- Which type to plant: Opt for a soft neck variety like 'Silver White' or 'Inchelium Red,' as they bulbs store for a longer period.
- Where to score seeds: Buy garlic seeds online from reputable vendors or visit your local farmers' market or nursery. Avoid those garden centers that sell bulbs rather than seeds – their garlic isn't typically suited for growing new plants.
- How to plant: Whether you've got a raised bed, plot of land, or container, plant garlic cloves 2-4 inches deep and 6 inches apart.
Enter your email address, and we'll send you the cheat sheet pronto! And hey, while you're at it – we'll also hook you up with our weekly "In the Garden E-mail" featuring garden resources tailored to your needs, as well as access to our treasure trove of free garden downloads.
By submitting your email, you're agreeing to our privacy policy and will have the option to unsubscribe at any time. Ain't nothin' to lose but a mess of bad garlic! May your garden flourish!
- To keep your garlic thriving in your home and garden, consider subscribing to the Beginner's Garden Podcast or exploring garden resources available online, such as garden printables or tips on home-and-garden lifestyle.
- For optimal garlic growth, ensure you're planting soft neck varieties during fall, around September or October, and consider choosing types like 'Silver White' or 'Inchelium Red' that store well. You can find seeds on reliable online vendors or at local farmers' markets and nurseries.
- When the time comes to harvest your garlic, follow some best practices, such as digging out on a cloudy day and shaking off excess dirt before curing your bulbs for several weeks in a cool, well-ventilated location. Remember to save some top-quality bulbs for replanting next fall.


